13 November 2010

Pumpkin-Pie-in-the-Middle Cupcakes


Please don't tell my mom; I skipped class to make these cupcakes. I was just having a rough day. My roommate in DC this summer, Beth, posted this recipe to my wall. I was so frustrated that I promptly skipped class, drove straight to Kroger, and set to work. It was exactly what I needed to make me feel in control of my life again. How does that always happen? Even better, these cupcakes were absolutely delicious, and obviously unique. Pumpkin pie IN a cupcake!? As my friend Mackey said "They solve the eternal debate over which is better, cake or pie."

Basically, the gist of this cupcake is the following: vanilla cream cheese cupcakes with a tiny pumpkin pie in the middle, topped with vanilla-cinnamon buttercream icing. AND THEY ARE DELICIOUS. The only major flaw with the design is that it's one of the more labor-intensive recipes I've undertaken, specifically because it's like you're making two separate desserts.

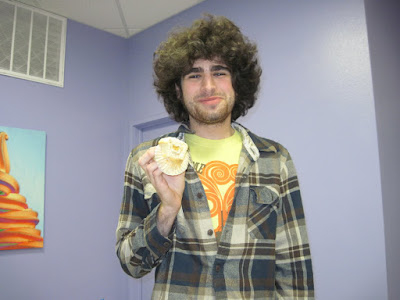
Also, I apologize for the really terrible quality of the cupcake picture uptop. I was (literally) running to my exec meeting when I realized I should probably photograph the cupcakes before they got eaten. To make up for it, I will give you a zillion pictures of my friends on APhiO's exec board devouring said cupcakes. You're welcome.

Pumpkin-Pie-in-the-Middle Cupcakes
Adapted from bakeitinacake.com

Ingredients:
  • For the pumpkin pies:
- 1 box refrigerated pie crust
- 8 oz pumpkin
- 8 oz sweetened condensed milk
- 2 eggs
- 1 tbsp pumpkin pie spice (nutmeg, cinnamon, ginger)
  • For the cupcakes:
- 1.5 sticks butter, at room temperature
- 8 oz cream cheese, at room temperature
- 1.5 c sugar
- 3 eggs
- 2 tsp vanilla extract
- 2 tsp baking powder
- .5 tsp baking soda
- .5 tsp salt
- 1.33 c whole milk
- 2.5 c flour
  • For the icing:
- 2 sticks of butter, room temperature
- 8 oz cream cheese, room temperature
- 2 c powdered sugar
- vanilla extract and cinnamon to taste

To Make:
  • Pumpkin pies:
- Preheat oven to 425 degrees F.
- Combine pumpkin and sweetened condensed milk in a bowl until fully incorporated. Add eggs, one at a time, then spices. Mix well.
- Using a juice glass, cut dough into small circles, and use them to line mini muffin cups. Fill each crust about 3/4 of the way full with the pumpkin mixture.
- Bake for 7 minutes, then reduce oven heat to 350 degrees F and continue baking for 10 more minutes, until the crusts are golden and the filling is set.
- Allow to cool 5 minutes before removing from mini muffin tins.
  • Cupcakes:
- Cream butter and cream cheese together for about 90 seconds, then add the sugar and mix well. Add the eggs one at a time, then the vanilla, baking soda, baking powder, and salt.
- Add milk and flour, alternating between small amounts of the two until completely combined and smooth.
- Line regular muffin pans with paper liners. In each liner, place a heaping tablespoon of the batter. Place a pumpkin pie in each and gently push down (the pie should NOT touch the bottom of the pan). Place another heaping tablespoon of batter overtop of the pies, so that the top and sides aren't visible.
- Bake at 350 degrees F for 20-25 minutes. Allow to cool 10+ minutes in the pans before removing to cool completely before frosting.
  • Icing:
- Cream together butter and cream cheese until smooth.
- Add powdered sugar, incorporating by half cups, then vanilla and cinnamon.
- Chill before frosting.

Some Notes:
  • That pie filling is annoying. I used a full 16ish oz can of pumpkin because that's the smallest they sold and made it according to the back of the can, and I now have a ridiculous amount of excess filling chilling in my fridge. So, be warned, you will either have to throw out some perfectly good pie filling or do like I plan on, and make personal pumpkin pies in regular muffin tins. Yum!




26 August 2010

Peanut Butter-Chocolate Fudge


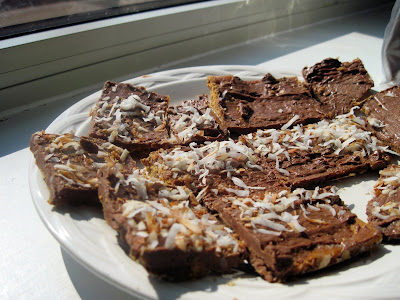
This is, by far, the fastest recipe I have ever posted on here. I get out of class at 3:30 pm. There is a 10 minute walk from Irvin to my apartment. This fudge was chilling in the fridge by 4:00 pm, on the dot. The only bad thing about this is that when I go to deliver this fudge to boys, they will know that I did not slave for hours over it. Oh well. They'll get over it. They have homemade fudge, after all.

Oh, speaking of my apartment, I AM BACK IN OXFORD! I am also living in an amazing apartment which has been christened The WeinDen (don't ask... it's not funny to anyone but us), with one of the loveliest girls I have ever met, Maggie. There is so much roomie love going on over here that it's almost nauseating. Almost.

Given my sah-weet digs, I would just like to reiterate my policy on visitors to The WeinDen: Yes, please. If you live in Oxford, you are nearly always welcome, so long as we are home and not napping. If you live outside the greater Ox Vegas area, I have a futon, a couch, and a comfy queen-sized bed. Take your pick. Also, I will make you the baked good of your choosing. So get on it!

Peanut Butter-Chocolate Fudge

Ingredients:
  • 10 oz peanut butter chips
  • 14 oz sweetened condensed milk
  • 4 tbsp butter
  • 8 oz semi-sweet chocolate chips
To Make:
  1. Line 8x8 baking pan with parchment paper (Thank you to Julie for buying me my first roll as a going away present!)
  2. Melt in a saucepan over medium heat the peanut butter chips, 1 c sweetened condensed milk, and 2 tbsp butter until smooth. Pour into baking pan and spread evenly.
  3. Melt in another saucepan the remaining sweetened condensed milk, butter, and chocolate chips until smooth. Spread over peanut butter mixture. Refrigerate for at least 2 hours. Turn out of parchment paper and cut.
Some Notes:
  • Next time, I am going to vary it up by subbing some real peanut butter for a portion of the chips (and probably taking out the butter as well).

14 August 2010

Red Velvet Cupcakes (For Jazz Musicians)


Holly on the left, Bray on the right, yours truly in the middle.

Tibbs chowing down.


So, I'm back in the A-k-rowdy, at least for the moment. I've been here a week now, but there has been utter pandemonium with my dad moving into his new house, and trying to figure out where I'm stashing all my stuff, as well as catching up with just about everyone I ever knew in high school, and making some new friends along the way.

I've been restless lately, and everyone can see it. I cut and dyed my hair, got a new piercing (or two) and have been making some pretty poor decision-making as of late. I needed some centering, so when Brandy issued her cupcakes-at-Northside ultimatum, I jumped to comply.

Oh, and if you're unfamiliar with what Northside is, please allow me to enlighten you. The Northside, technically, is an almost-hole-in-the-wall bar in downtown Akron. On Wednesday nights, The Northside hosts an open-mic jazz workshop for the University students from 9 pm until midnight. If you're in the Akron area, GO! It's a great time. Afterwards, many of the musicians (with whom I've become friends because of my frequent attendance) go eat at Luigi's, next door.

They work hard, and hard work should be rewarded. Hence, cupcakes.

The actual text message conversation that begat the inception of these cupcakes (yep, big words... get over it):

Bray: Cupcakes, as promised, at Northside tonight?
Auds: Oh, damn. I forgot.
Bray: You have three hours. Make it happen.
Auds: Yes, ma'am.

In Brandy's defense, she did come over and help frost the cupcakes, as well as keep my company as I dyed my hair a color similar to red velvet. Holly Jane and Zoe were there too, ready and willing to steal half-made frosting, incubate my eggs to room temperature, and tell me that my hair looked fabulous. It's really why I keep them around... Kidding, of course.

Oh, and the cupcakes got rave reviews. :)

Red Velvet Cupcakes w/ Vanilla Icing
Adapted from More from Magnolia

Ingredients:
For cupcakes-
  • 3 1/2 c cake flour
  • 1 1/2 stick butter (softened)
  • 2 c sugar
  • 3 eggs (at room temperature)
  • 2 1/2 tbsp red food coloring
  • 3 1/2 tbsp water (at room temperature)
  • 3 tbsp unsweetened cocoa powder
  • 1 1/2 tsp vanilla extract
  • 1 1/2 tsp salt
  • 1 1/2 c buttermilk
  • 1 1/2 tsp cider vinegar
  • 1 1/2 tsp baking soda

For icing-
  • 6 tbsp flour
  • 2 c milk
  • 2 c butter (softened)
  • 2 tsp vanilla extract

To Make:
  1. Preheat oven to 350 degrees F. Line 2 cupcake pans with liners. Sift cake flour and set aside.
  2. Cream together butter and sugar for cupcakes on medium speed until very light, about 5 minutes. Add eggs one at a time, beating in between.
  3. In a separate bowl, whisk together food coloring, water, cocoa powder, and vanilla. Add to the batter.
  4. Stir salt into buttermilk. Add in 3 parts, alternating with the cake flour, to the batter. In a small bowl, combine vinegar and baking soda. Add to batter, and mix well. Divide batter between cupcake tins.
  5. Bake for 18-20 minutes, or until a tester inserted into one of the cupcakes comes out clean. Allow to cool completely before frosting.
  6. In a medium saucepan, whisk together flour and milk for icing. Stir constantly over medium heat until the mixture becomes very thick (about 10 minutes). Cover with waxed paper placed directly on mixture and cool to room temperature (can be refrigerated to speed up the process).
  7. Beat the butter for the icing until it becomes smooth, about 5 minutes. Add sugar and beat until fluffy, about 3 minutes. Add vanilla. Beat again (it's a theme!)
  8. Add cooled milk mixture to butter mixture and beat for 5 minutes. Frost cupcakes immediately.
Some Notes:
  • As with most of the cupcakes I make, the frosting-cupcake ratio should be at LEAST 1-1. If you're going to eat a Pastry Flower dessert, expect to go into a sugar comatose directly after. But really, more is better when it comes to icing on these cupcakes.
  • And don't be deterred by the complexity of the icing. It was better than ANY store-bought.

03 August 2010

"Everything Nice" Muffins

Om...
... nom...
...nom.


When I started baking, it was out of necessity. It was the winter of 2005, just after Christmas, and I was battling terrible insomnia and slight depression. It was awful. I would spend hours sitting, staring at my computer, updating Facebook, lying on my carpet wishing that I could sleep. One night, I wandered down to the still-set-up Christmas tree and started sifting through the gifts that I'd received. One of those gifts was Mollie Katzen's Sunlight Cafe, still one of my favorite cookbooks today. After everyone else was asleep, I would sneak downstairs and, as quietly as possible, bake the easiest things from the cookbook with whatever happened to be around in the kitchen. Invariably, after each recipe was finished, I would crash immediately upon my bed, or the couch, or the rug in our kitchen... whatever happened to be easiest. A love of baking was born, alongside a coping mechanism.

To this day, I can tell when I'm verging upon emotional instability when I start itching to break out my pans. It's not only something to do to pass the time; it's also one of the few times when I don't let the opinions of others dictate my actions, when I have overwhelming self-confidence and a can-do attitude, and when, even in the midst of emotional quicksand, I can dance around the kitchen, singing into a whisk and everything is right in my life. The process takes as long as it takes; I can't speed it up or slow it down, even if I wanted to. And, best of all, my friends love me for it. When these muffins came out of the oven, my roommate Beth came into the kitchen and said, point blank, "I could kiss you right now. But I think you'd be weirded out."

Sugar and Spice ("Everything Nice") Muffins
Adapted from Gourmet

Ingredients:
  • 1 c flour
  • 1 1/2 tsp baking powder
  • 1 tsp pumpkin pie spice
  • 1/4 tsp salt
  • 1/3 c sugar
  • 1/4 c butter
  • 1 egg
  • 1/3 c milk
  • 1/4 c brown sugar
  • 1 1/2 tsp cinnamon
To Make:
  1. Preheat oven to 375 degrees F. Line 6 muffin cups with liners.
  2. Sift together flour, baking powder, pumpkin pie spice, and salt. In another bowl, cream together sugar and butter. Beat in egg. Add dry ingredients to wet ones and beat until combined. Add milk and stir until just combined.
  3. Combine brown sugar and cinnamon in small bowl.
  4. Spoon batter into cups half full. Sprinkle some of the brown sugar and cinnamon on top of batter. Spoon more batter into cups (until 5/6 full) and top with remaining brown sugar/cinnamon mixture.
  5. Bake for 20-25 minutes.
Some Notes:
  • Next time, I will sub brown sugar for the white sugar in the batter.
  • Also, next time, I'm going to make extra sugar/cinnamon mixture and put more inside the muffins.
  • These muffins are not overwhelmingly sweet, but I like them that way.

01 August 2010

Kevin and Susan's Joint Birthday Cake!


Oh, how I wish I had my pastry bags...


In honor of the days-of-birth of my super Canadian roommate and my friend Kevin, I decided to make a cake. And yes, I'm aware that this cake is pink. To Kevin, I apologize, but it tastes delicious so I'm pretty sure he didn't mind much. Anyway, a very, very happy birthday to two of my good friends down here!


The birfday boy and girl, respectively.


A short sidenote: I leave DC in 6 days, and all the friends that I have made here will be scattered across the continent. I want to thank you all for making this summer amazing. I will honestly miss you. All of you. Even the ones I complain about. Really. Truf.

So, this cake is the very first undertaking of a significantly difficult recipe since being in DC, mostly because I was getting sick of making cookies. It involved buying several kitchen utensils to add to my arsenal back home, and making up a significant part of this recipe. For being a brand new recipe, mostly made-up using techniques from other recipes I've tried in the past, this cake turned out FABULOUSLY. I felt almost like a real pastry chef... hahahaha... right. I definitely lamented not having my pastry bags and decorating tips down here with me though... The finished product was pretty, no doubt, but being the perfectionist I am, I wish I hadn't just had to use ziplocs. Sigh.


Chocolate Cake with Raspberry Cream Frosting and Chocolate Sauce

Ingredients:
(For cake)
  • 1 c sugar
  • 3/4 c flour
  • 1/3 c unsweetened cocoa powder
  • 1 tsp baking soda
  • 1/2 tsp baking powder
  • 1/4 tsp salt
  • 1/2 c fresh-brewed coffee
  • 1/2 c whole milk
  • 1/3 c vegetable oil
  • 2 eggs, beaten
  • 1 tsp vanilla
(For frosting)
  • 6 oz fresh raspberries
  • 2 tbsp light brown suga
    r
  • 1 tsp lemon juice
  • 1 1/2 tsp cornstarch
  • 3/4 c whipping cream
  • 2 tbsp powdered sugar
(For chocolate sauce)
  • 1/4 c whipping cream
  • 1/2 c semisweet chocolate chips
To Make:
  1. Preheat oven to 350 degrees F. Spray a 4.5 in x 8.5 in loaf pan with nonstick spray and dust with cocoa powder.
  2. In a large bowl, sift together the first 6 ingredients for the cake. In another bowl, combine coffee, milk, oil, eggs and vanilla, and beat to blend. Pour wet ingredients into the dry ones, and stir until just combined. Pour into floured pan and bake for 35 minutes, or until a knife inserted in the middle comes out clean. Cool in pan for 20 minutes, then invert onto cake tray and cool completely before frosting.
  3. In a small saucepan, mash together brown sugar, raspberries, and lemon juice. Cook on low heat, stirring for 3 minutes. Remove from heat, and push raspberry mixture through a sieve to remove seeds (what is left should be raspberry juice, basically). Add cornstarch to the juice, and cook on medium heat in saucepan for 5-7 minutes. Remove and refrigerate until very chilled.
  4. In a refrigerated bowl, combine whipping cream for frosting, powdered sugar, and about 1/3 of the raspberry sauce. Whip until stiffer than you would want whipped cream to be. Fold in another 1/3 of the raspberry sauce.
  5. In a double boiler, combine the whipping cream for chocolate sauce and chocolate chips until melted. Allow to cool for 10 minutes, and then spoon into a pastry bag.
  6. Okay, now it's time to assemble the cake! Frost the completely cooled cake with the raspberry cream frosting, and chill for 10 minutes more. Drizzle with the chocolate sauce and the rest of the raspberry sauce. Chill until ready to serve.
I put the 'mess' in 'domestic'.

29 July 2010

Raspberry Chocolate Clafoutis


I love this last photo. It makes me drool.


Clafoutis: the dish so nice, I made it twice... in the span of two weeks. Okay, that was cheesy. I apologize. I'm not going to lie; clafoutis are easy, delicious, versatile, and can sort of pass as breakfast food when I'm running out the door in the morning. Ahem. Also, I just plain love anything chocolatey, and since the HUGE power outage that knocked out the power for something like 300,000 houses in our area, I've been looking to use the defrosted frozen (previously fresh) berries that have been sitting in my fridge.

This is me being industrious and delicious AT THE SAME TIME. Admit it; I'm awesome.

I think my roommates are FINALLY getting used to my style of baking (aka loud music, dancing, godawful singing, and a huge mess everywhere... hey, I never claimed to be the prettiest baker to ever hit the interwebs). Cassie even asked... okay, who the hell am I kidding? Cassie DEMANDED to help me mix the batter, in between screaming at the new episode of Jersey Shore. I live in a mental asylum, but at least it's interesting. :)

Also, for the first time, I let the gods of last.fm decide upon my musical selection while baking. Laaaaazy. I just used the "Play Your Library" function, and it spit out a great mix, which I will now enumerate. Those who care, feel free to add me as a last.fm friend! --> http://www.last.fm/user/alynnhouse
Those who don't, feel free to skip ahead.

1) "The Resistance" - Anberlin
2) "Cuddle Fuddle" - Passion Pit
3) "Are You Sleeping?" - Harry Nilsson
4) "Crush'd" - Say Anything
5) "Tidal" - Imogen Heap
6) "Are You With Me" - Vaux

Primo jumping around the kitchen music. :)

ANYWAY... on to the actual recipe. This recipe, it turns out, is NOTHING like the other clafoutis recipe I posted. This dessert is very much a dessert; it's very rich and sweet and tangy (thanks to the raspberries). The texture is much more like a custard (thanks, I'm sure, to the whole milk and less eggs). Still, this recipe is absolutely a keeper, just for a different purpose. Yum!

Raspberry Chocolate Clafoutis
Adapted from Gourmet

Ingredients:
  • 12 oz raspberries
  • 1 tbsp sugar
  • 1/3 c flour
  • 1/2 c brown sugar, packed
  • 2 tbsp unsweetened cocoa powder
  • 3 eggs
  • 1 c whole milk
  • 4 tbsp unsalted butter, melted
  • 1/4 tsp salt
  • 6 oz semisweet chocolate, roughly chopped
To Make:
  1. Preheat oven to 400 degrees F. Spray baking dish (I used the infamous casserole dish, but I'm sure any would work) with nonstick spray.
  2. Toss raspberries with sugar and set aside.
  3. Combine all remaining ingredients EXCEPT chocolate, beating until smooth.
  4. Spread raspberry mixture evenly in bottom of baking dish. Pour batter over raspberries.
  5. Bake for 35 minutes (SEE NOTES) until puffed up. Remove and immediately scatter chocolate over the top. Cool for at least 20 minutes.
Some Notes:
  • Next time I am absolutely going to butter the dish instead of nonstick-spraying it. It created the best crust on my last clafoutis.
  • I would definitely recommend lengthening the baking time by at least 5 minutes on this dish. It didn't firm up the way I expected it would... nothing like my last clafoutis. I think this was probably because the raspberries I used were much juicier than the cherries. Although this clafoutis was cooked through, it was the most custard-like around the edges.
  • Next time I might also use bittersweet chocolate, like the original recipe called for, instead of semisweet. The semisweet and the raspberries together were a bit much. It would have been nice to have the bite of bittersweet.

24 July 2010

Cookies 'n' Creme Fudge


If there's anything that I love, love, L-O-V-E, it would have to be fudge. I think I could eat fudge every day for the rest of my life and be completely content with it. So many variations, so much delicious.

It's been hot like Hell in DC this weekend, with temperatures hitting 104. So what did I do all day today? Well, I trekked around the hot and humid streets of DC, hitting museums and searching out food with Jack Licata... in retrospect, not a good decision on our parts. I got sunburnt and dehydrated, and was in no shape to do anything productive this afternoon. I'd been wanting to make fudge for a while, and my roommate Cassie INSISTED on me varying up the flavor. She helped me find a recipe for cookies 'n' creme fudge, and I ran with it.

Cookies 'n' Creme Fudge

Ingredients:
  • 12 oz. white chocolate
  • 12 oz. sweetened condensed milk
  • 1/8 tsp. salt
  • 2 c. roughly chopped chocolate cookies
To Make:
  1. In a saucepan, over medium-low heat, combine white chocolate, condensed milk and salt. Stir until smooth.
  2. Fold in the cookies.
  3. Line a baking pan with foil, and spread the mixture into the pans. Chill for at least two hours. Turn the fudge out onto a cutting board, and remove the foil.
Some Notes:
  • Eliminate crumbs when chopping the cookies. They discolor the fudge.
  • Be very, very careful to stir the white chocolate constantly while melting, and not to allow it to burn. The mixture can go from beautiful to disaster in seconds.
  • This is such a basic recipe, and so easy to make, I am definitely going to get creative with flavor combinations in the future! Be ready for some weird fudge flavors coming out of this kitchen.

Now THAT'S a kitchen!


Today I visited the Smithsonian Museum of American History, here in DC, for one reason alone... to view the kitchen that Ms. Julia Child used to film her cooking show! Yes, I'm aware that this is incredibly nerdy on my part, but I couldn't care less. I was obsessed. If I'm romantic about anything, it's food, and the Julia Child exhibit definitely capitalized on that. I've posted some of my pictures below!


Pretty phenomenal.

I would KILL for a set of pots and pans like that.

Oh hey, it's me. :)

Ms. Child's diploma from Le Cordon Bleu.

Will do, Julia.

22 July 2010

Sunshine Thins


When I was trying to describe these to Jacob (as I was making them), the only thing I could come up with was "lemon glazed butter things." But after one bite, I knew exactly what they reminded me of... sunshine. Hence, the name, obvi. One bite and I was able to breathe easier, smile, and relax... something I haven't been able to do in weeks. Maybe it was the way that these cookies are airy and light and just melt in your mouth. More likely, it's probably the tangy-sweetness of the lemon glaze, which is by far one of my favorite scent and tastes. Either way, I am impressed with this largely made-up recipe, and suggest you make it straightaway.

Sunshine Thins

Ingredients:
  • 1/2 c (1 stick) of butter at room temperature
  • 3/4 c sugar
  • 1 egg
  • 1 tsp vanilla
  • 1 1/2 c flour
  • 4 tbsp lemon juice, separated
  • about 2 c powdered sugar
To Make:
  1. Preheat oven to 350 degrees F. Cover baking sheet with nonstick foil.
  2. In large bowl, cream together butter, sugar, egg and vanilla until light and fluffy. Add vanilla and 1 tbsp lemon juice, and mix thoroughly.
  3. Place powdered sugar in a small bowl. Form dough into 1" balls (careful... very sticky <-- that's what she said) and roll each ball in powdered sugar, placing on baking sheet. Then roll balls in powdered sugar for a second time. Place about 1.5" apart on the baking sheet.
  4. Bake for 8 minutes in the center of the oven. Rotate pan. Bake for another 8 minutes, or until golden around the edges.
  5. Let cool for a few minutes. While they are cooling, mix remaining powdered sugar with lemon juice incrementally until a glaze is formed. Top cookies liberally with glaze.
Some Notes:
  • If you want to go for presentation, when you rotate the cookies, you can fork-press them a la peanut butter cookies. It makes them pretty!
  • Next time, I think I'm going to sprinkle turbinado sugar on after the glaze, for presentation and texture.

Fluffernutter-Chocolate Chip Cookies


First of all, I apologize for the terrible pictures, but you will get over it. I promise.

Some nights, you just don't feel like going out. Some nights, you feel like laying on the floor, even though there is a perfectly good couch, with two of your three roommates, reading good literature, and baking ridiculously easy cookies. Oh, hello, last Friday night...

These cookies are easy-peasy, with 4 ingredients and, like, a grand total of 20 minutes start to finish (baking time included). They require one bowl, one spoon, one baking sheet, and one oven, equipment-wise. So you really can make them, even if you "live in a frat house with no tasty food." No excuses.

Oh, and I apologize for the imprecise measurements, but if it really bugs you, all I can say is: pull the stick outta your butt, and start being more impulsive. Kthanks.

Fluffernutter-Chocolate Chip Cookies

Ingredients:
  • 1 regular jar of creamy peanut butter
  • 1 egg
  • 1 regular jar of Jet Puffed marshmallow creme
  • 12 oz chocolate chips
To Make:
  1. Preheat oven to 375 degrees F.
  2. In a large bowl, combine peanut butter and egg thoroughly. Mix in marshmallow creme, but DO NOT mix thoroughly. You should still be able to see white streaks.
  3. Fold in chocolate chips. Be careful not to overmix.
  4. Drop in spoonfuls onto a greased cookie sheet.
  5. Bake for 8-10 minutes. Allow to completely cool on cookie sheet before you try to remove them, or they will crumble.
Some Notes:
  • Honestly, the cookies were better the day after. This might be one of those recipes that you should probably let sit. And they weren't good hot, but they were DELICIOUSLY rich after they had cooled off a little.

Oh, hey roommates...!

21 July 2010

Trainwreck Cookies with Toasted Coconut


I have so many memories attached to these particular cookies.

The story behind the naming of the Trainwreck Cookies:
It took me a very long time to figure out how to make these delicious cookies look presentable (and even now, they're frustrating as hell, and break easily when you try to get them off the foil... but totally worth it). The first time I ever made them was for Thanksgiving a few years back, when my grandparents, my mother, my brother and I visited my mom's sister and her family in Texas. I must say up front that when I was younger I always adored and idolized my Uncle Mike. As I was wrestling with the tin foil, and subsequently looking like a fool, my uncle came into the kitchen, stopped, looking at me, laughed, and said "Well, this looks like a trainwreck." He ate his words later (and, like, the entire plate of cookies... hah!).

Another (less interesting) memory attached to these cookies is when I would make them and bring them into IB English 12 every couple of weeks. It was one of my first experiences wherein I was liked implicitly by people (aka Brittany and the swimmer boys) who really didn't give a damn about me beforehand. Because I brought in cookies, they not only were nice to me, they also requested my baked goods with increasing frequency. It was nice to be of value, but not too nice. Ultimately, it just solidified my dislike of mean and snobby people.

Anyway, this time, I made them to celebrate my 20th birthday, which was on Monday.

Trainwreck Cookies are chocolate-caramel graham cracker cookies with accentuation. These cookies are tied with my Chocolate Peanut Butter Chip Cookies for the most universally well-liked of my cookies. The Trainwreck Cookies have the added benefit of being very versatile, and can be topped with just about anything: chopped and toasted nuts, M&Ms, other kinds of chocolate, or (as in this case) coconut. I have vowed to get this recipe completely perfect, and am well on my way. See my notes, at the end.

Trainwreck Cookies

Ingredients:
  • nonstick cooking spray
  • 1 1/2 packs graham crackers (they usually come 3 packs/box)
  • 1 1/2 sticks unsalted butter
  • 1/2 c brown sugar
  • 12 oz semisweet chocolate chips
  • about 1 1/2-1 c of desired topping
To Make:
  1. Preheat oven to 375 degrees F. Line baking pan with high sides (trust me, it's important) with NONSTICK foil (also important), so that there is a couple inches of overhang on every side. Spray foil with nonstick cooking spray. This will make your life so much easier in the long run.
  2. Place graham crackers on baking sheet in a single layer, as tightly packed as possible, so you have a sheet of graham crackers.
  3. In a pot on medium heat, melt the butter, then add brown sugar. Stir until the mixture resembles caramel, for about 5 minutes.
  4. Pour caramel evenly over graham crackers, and spread with spatula. Bake for 6-8 minutes, until the caramel is violently bubbly (and the kitchen smells delicious).
  5. Take pan out of over, sprinkle chocolate chips evenly over graham crackers. Bake for another 2 minutes. Using spatula, spread melty chocolate evenly over graham crackers. Top with desired accenting topping(s).
  6. Allow to cool in pan for 30 minutes, then place in freezer for 15. After frozen, allow to thaw for a few minutes, then using a sharp knife, make deep cuts in the sheet of cookies to delineate intended cookie size. Then, pray that the foil comes off.
Some Notes:
  • My Canadian roommate suggested using parchment paper instead of foil next time. I am absolutely going to do so. If you try it before me, let me know how it works!

20 July 2010

Cherry Clafoutis


Helloooooo! We're going to go ahead and pretend that I have not been completely absent for the last half a year. Let's, instead, accept the fact that I'm coming late to the party, and embrace the fact that I showed up at all!

I've been living in Washington, DC this summer, interning and generally getting lost way more often than I probably should be. The apartment that I'm living in came furnished with dishes, but they wouldn't tell me what dishes before I moved in... so I did the unthinkable. I LEFT ALL MY BAKING EQUIPMENT IN AKRON! And of course, we don't even have a baking pan other than a casserole dish. I've had to scrape, borrow, and sell my firstborn child to get any baking done here. Hence, this lovely breakfast food... Cherry Clafoutis in a casserole dish!

Kat and I FINALLY had time to talk on the phone about a week ago... and oh, boy, did we talk. I miss her, although I'm really excited that she's moving out West in a little more than a week, I also am jealous and want to be able to visit her a lot! P.S. Kat- I am buying a ticket next week. Thanksgiving for the ages!

Anyway, she point-blank told me to make a clafoutis. And because I respect my elders, I did. And it was delicious. If you don't know what a clafoutis is... I really can't help you out. It's french in origin. But I can't figure out how to explain what it tastes like other than the french like butter a lot, and cherries are delicious this time of year. And now that I'm absolutely pro at clafoutis-ing, I have a killer recipe for raspberry-chocolate clafoutis that I could probably pass off as some semblance of a breakfast food...

Glad to be back. :)

Cherry Clafoutis "Casserole"
Adapted from Sunlight Cafe

Ingredients:
  • 1 tbsp butter
  • 1 1/2 c ripe cherries, pitted and halved
  • 1 1/3 c flour
  • 1 1/2 c milk
  • 4 tbsp sugar
  • 4 eggs
  • 1/4 tsp salt
  • whipped cream
To Make:
  1. Preheat oven to 375 degrees F. While preheating, melt the butter in the bottom of the casserole dish, and allow to spread all over the bottom of the dish. Mix 1 tbsp of flour with the cherries and set aside.
  2. Combine milk, sugar, eggs, vanilla and salt and mix until smooth. Pour batter into the casserole dish, and spoon the cherries into the batter, concentrating them near the center.
  3. Bake the dish for 35 minutes, until browned around the edges.
  4. Top with whipped cream, and serve warm.

14 January 2010

Turbinado-Dipped Shortbread Cookies


I need to get more comfortable with people watching me bake. I don't know if it was the cameras, or having Cory, Emily and John in the kitchen with me while I made these shortbread cookies, but I was extremely self-conscious the entire time. Definitely not nearly as much fun as I usually have while baking (but then again my usual baking experience calls for me dancing around, blasting upbeat music and singing my heart out into whisks). What WAS cool, was being able to see each step of the baking process laid out in picture form, thanks to the wonderful photography of John Fetherston. I learned a lot; for example: I should never wear my new apron (courtesy of John and Etsy) with patterns... It clashes. Also, I need to stand up straighter.

Well, I had been craving shortbread cookies for a couple of days and on my last night in Akron, I decided to grab a movie with my favorite power couple and my favorite Arizonan and get to baking! Results were a success that were gone long before I was...

Turbinado-Dipped Shortbread Cookies
Adapted from Food & Wine

Ingredients:
  • 1 1/4 sticks butter, at room temperature
  • 1/2 c. powdered sugar
  • 1 1/2 tsp. vanilla extract
  • 1/2 tsp. salt
  • 1 1/2 c. flour
  • 3 tbsp. turbinado sugar (I used Sugar in the Raw)
  • 1 egg yolk, lightly beaten
To Make:
  1. Preheat oven to 350 degrees F.
  2. Beat together butter, powdered sugar, vanilla and salt until just fluffy. Mix in the flour in 3 batches at a slow speed, until just incorporated.
  3. On a (preferably cold) work surface, form the dough into a 1 1/2 in. thick log, and wrap in plastic wrap. Chill for one hour.
  4. Brush log with egg yolk using a pastry brush, and roll in the turbinado sugar until coated evenly.
  5. Cut the log into 1/2 in. thick rounds and place 1 in. apart on a greased baking sheet. Bake for about 18 minutes, or until brown around the edges. Cool completely.
Some Notes:
  • The original recipe also calls for 3/4 c. toasted and chopped pecans. I didn't include them because my friends aren't huge fans of nuts and I didn't have any on hand. They were delicious without them.
  • The dough was very hard to come together when forming the log. I believe this was because the butter wasn't perfectly at room temperature when I added it. Be careful!
  • I use a convection oven, and the original recipe called for baking the cookies for 20 minutes. Honestly, the batch was a little overdone for my tastes at 18 minutes, so watch carefully.

09 January 2010

Peanut Butter Chip Chocolate Cookies


Ick. I seriously need to stop taking my food shots with my camera phone. It just makes me sad! I got a ridiculously nice point-and-shoot digital camera for Christmas, even, and yet it never seems to be around when I need to take these shots. So, I heartily apologize for the terrible quality and color of this post's pictures, HOWEVER you will not have to deal with my camera phone crapola in the next post! I got to do some baking with my good friend John Fetherston, from Arizona, while he was in town, and he's a brilliant photographer with a pretty awesome photoblog (although he is waaay to humble to admit it) called "Life Through My Lens." I'm super excited to see his shots of me, up to my elbows in flour and butter. I am oh so attractive, after all...

Anyway, on to this post! On Wednesday, I drove to Columbus with Joelle Diane, Caitlin, and Leah for a Repower America rally. The day before, I decided that I wanted to make something pretty simple and basic that would be a good roadtripping snack. I decided to research some chocolate chip cookie recipes to make later that night, and read about 15 recipes online. I had the idea to use cocoa powder to flavor the dough and substitute peanut butter chips for the chocolate ones, and I went out and bought my ingredients. Of course, when I got home late that night and got ready to bake, our internet decided it just didn't want to play along. I, then, had to search my memory for (read: make up completely) the measurements and ingredients for these cookies. Given the circumstances, the results were absolutely jaw dropping.

Straight out of the oven, I had to leave the kitchen while they cooled, so as not to eat them all. The centers were gooey and warm and amaaaaazing, like the best Reese's cup you've ever imagined. The next day, they were a super big hit with my roadtripping sisters-in-arms. After they were all gone, there were multiple times when someone said "I really want one of those cookies!" My mother also made my brother eat all of the ones I left in her kitchen, because she was afraid to have them in the house. The verdict? Entirely too addictive for words, and simple to boot!

Audrey's Mostly Made-Up Peanut Butter Chip Chocolate Cookies

Ingredients:
  • 1 c. butter, cut into pieces
  • 1 c. sugar
  • 1 egg
  • 1 tsp. vanilla extract
  • 1 c. all-purpose flour
  • 1/2 tsp. baking powder
  • 1/2 tsp. baking soda
  • 1/2 tsp. salt
  • 1/3 c. cocoa powder
  • 1 1/2 c. peanut butter chips
To Make:
  1. Preheat oven to 350 degrees F. Spray a baking sheet with non-stick spray.
  2. Cream together butter and sugar until fluffy. Add the egg and vanilla.
  3. Sift together flour, baking powder, baking soda, salt, and cocoa powder in a separate bowl. Add by half cups to the creamed mixture, mixing to just barely combined after each addition. Fold in the peanut butter chips.
  4. Form dough into 1" balls and bake for 11 minutes. Cool on tray for 5 minutes, and then completely on a wire rack (if you can resist them that long).
Some Notes:
  • I really have nothing that I would change to this recipe. It was that good. Maybe I'll try substituting white chocolate chips next time.
  • I used Ghiradelli cocoa powder. I wouldn't be willing to compromise for cocoa powder of any poorer quality, because it lends the primary flavour to the cookies.